Making a Todolist with preact-js using appwrite as a backend
Updated
•11 min read
Highlights of the Project
- Using preact signals for state management.
- Preact routing.
- Appwrite backend services such as authentication and database.
Prerequisite
- Node js install on your system.
- Setup of appwrite locally see their docs for the setup.
- Basic understanding of React.
Setup
- This is the final repo of our app, take a look on this and the demo video of our app.
- Install preact globally by using the command
npm install -g preactin the terminal. - Now, create your preact app by using
npx preact-cli create simple preact-appwrite, this will set up our basic preact template. - Open your project folder in vscode or any other text editor.
- Open the terminal inside vscode and type the command
npm run devto start the project on the server, now our app is running on localhost:8080 type this address in your browser. - Our preact folder structure looks like this,
  📦src
  ┣ 📂assets
  ┃ ┣ 📜favicon.ico
  ┃ ┗ 📜icon.png
  ┣ 📜index.js
  ┣ 📜manifest.json
  ┣ 📜style.css
  ┣ 📜sw.js
  ┗ 📜template.html
Let's start the Project
- You see the folder of our app there is a file style.css and all the styling of our app goes into that file because this blog is not about css so feel free to copy and paste the css to your app.
- Start your appwrite server on localhost:80 on your system and sign in to it, it takes you to the appwrite console.
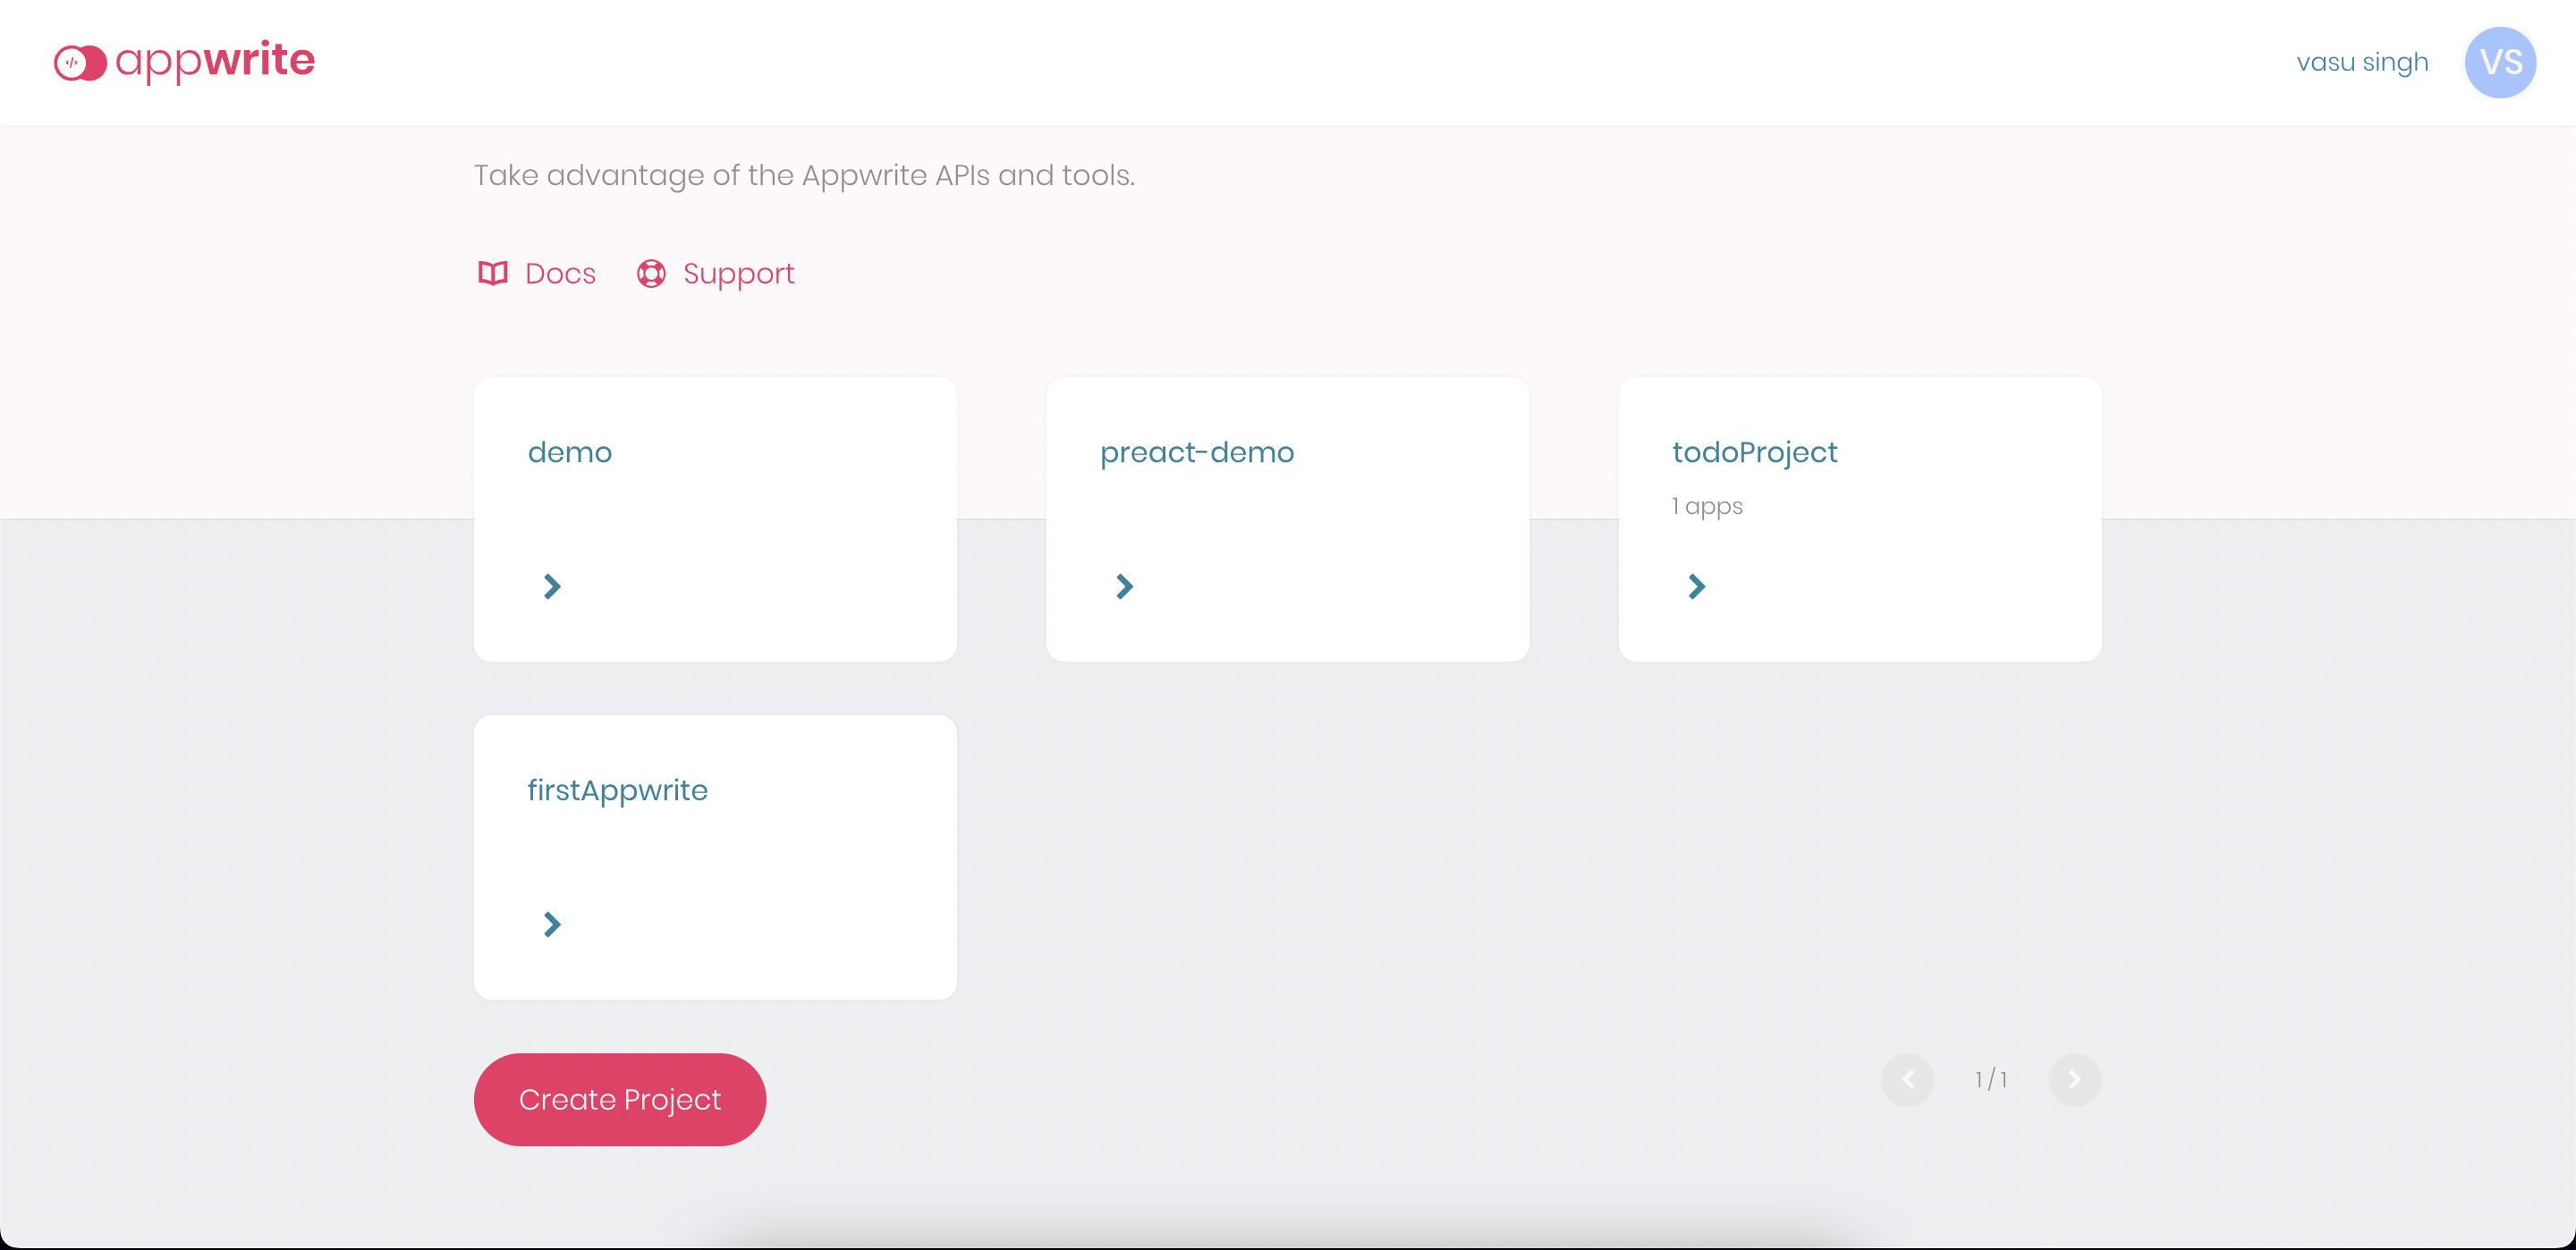
Console
Database and Collections
- Now, create your project by clicking the Create Project and it will take you to your project home dashboard.
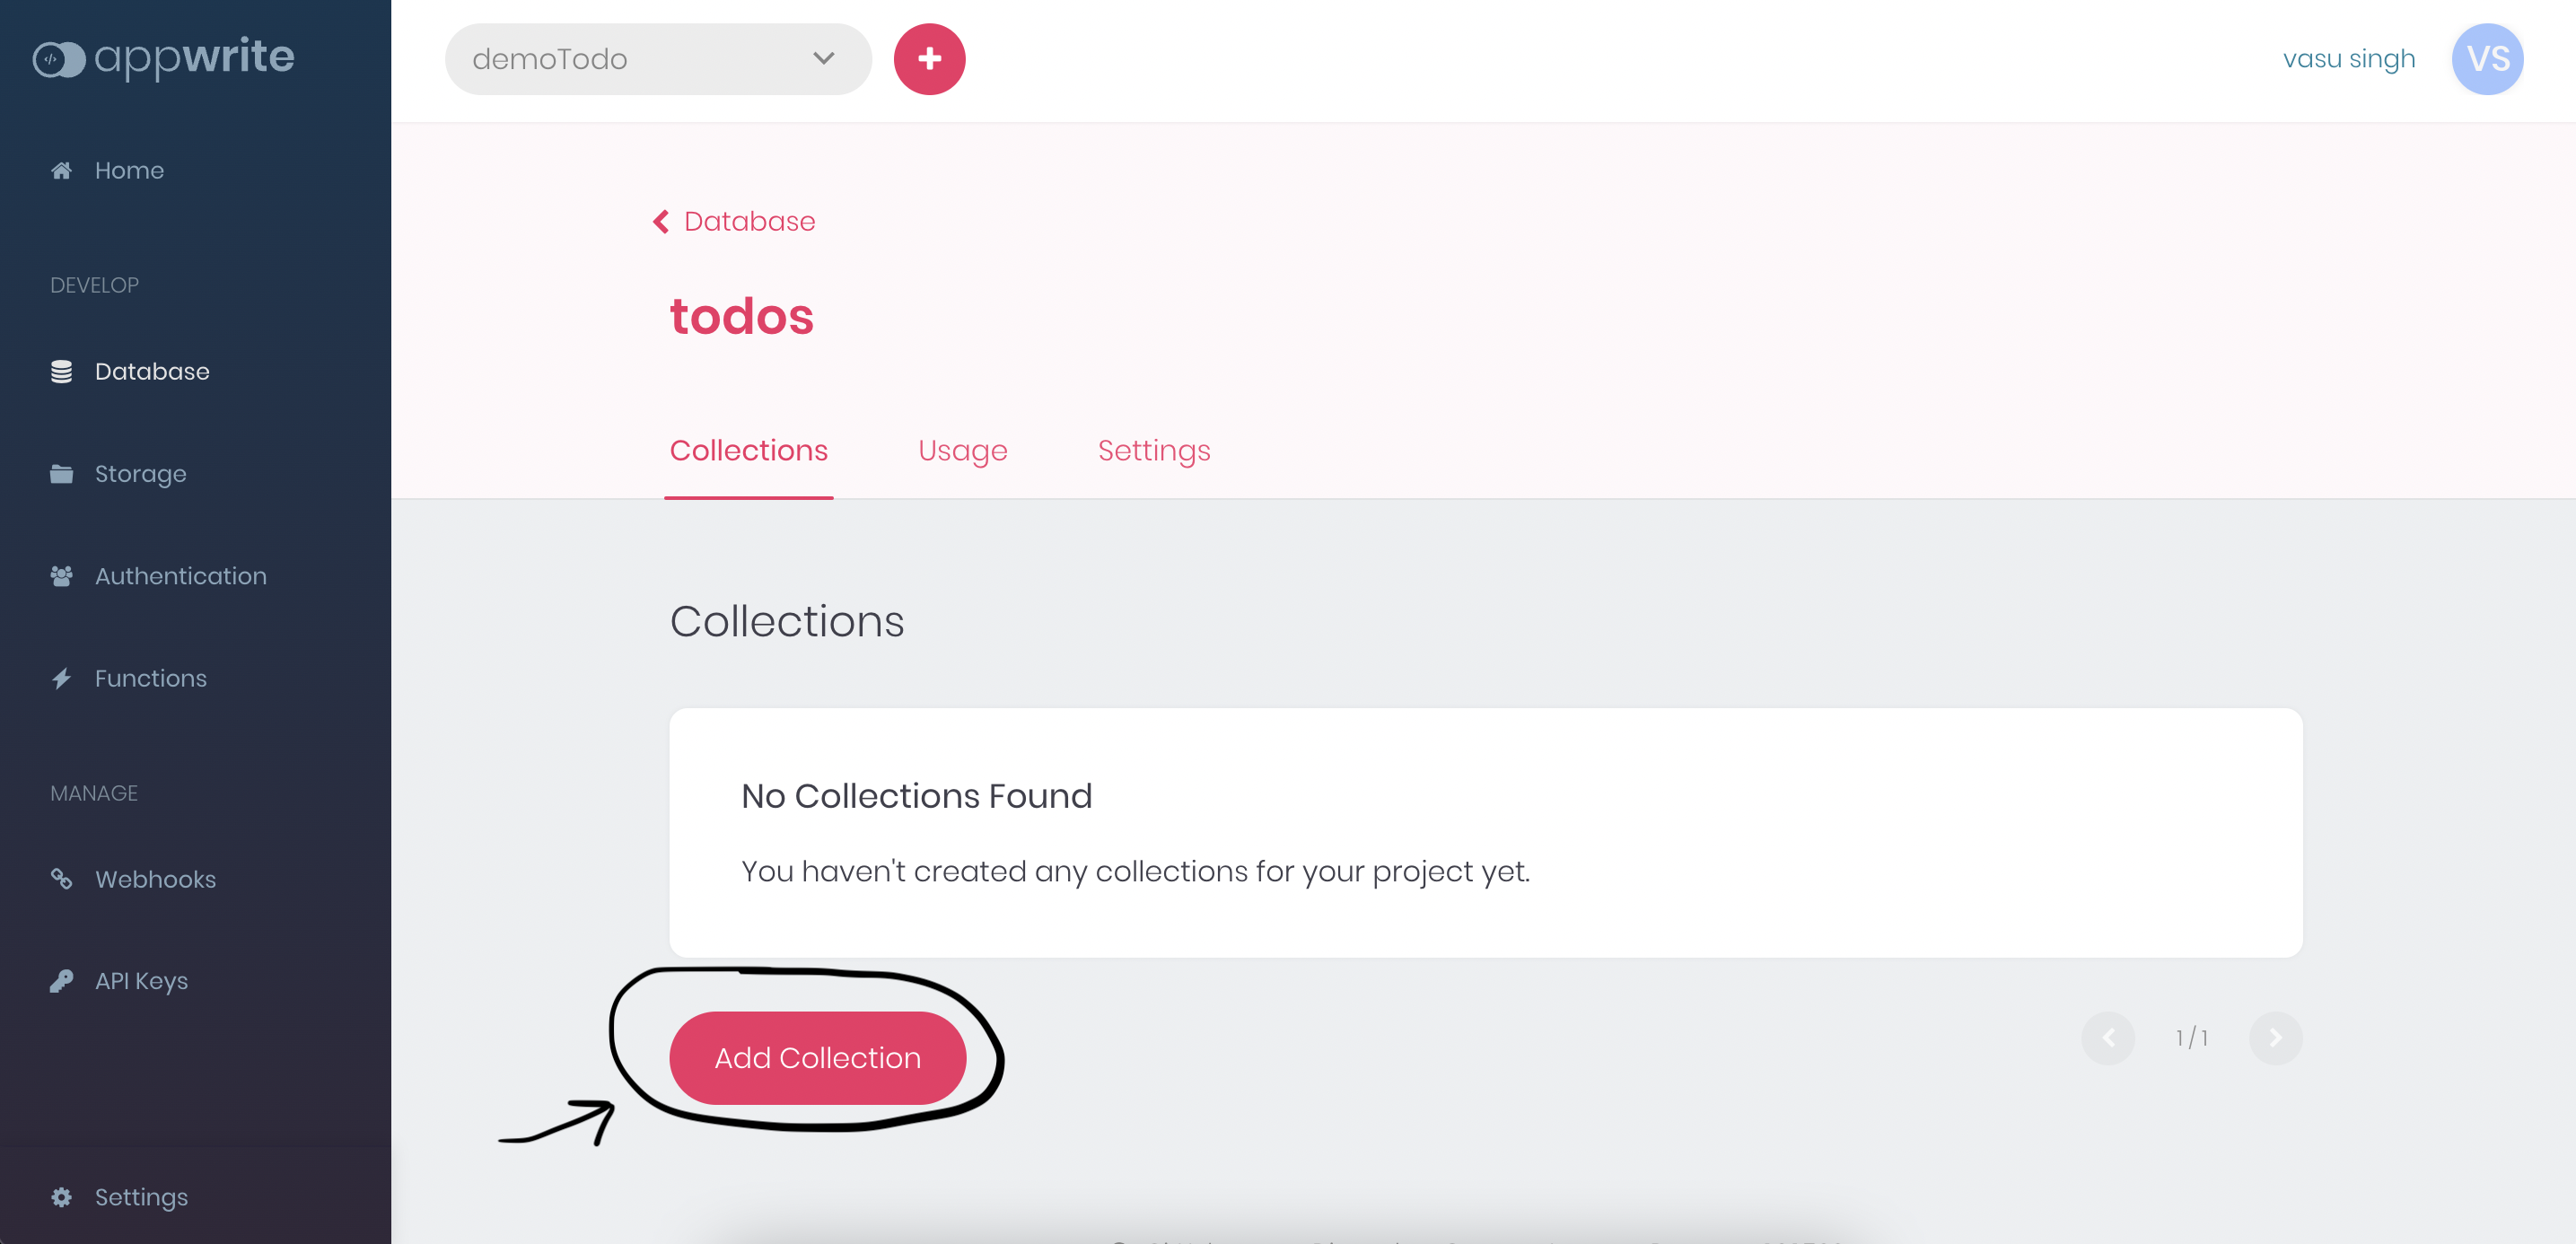
- Head over to the database section and add a database by clicking Add Database, then add a collection to our database.
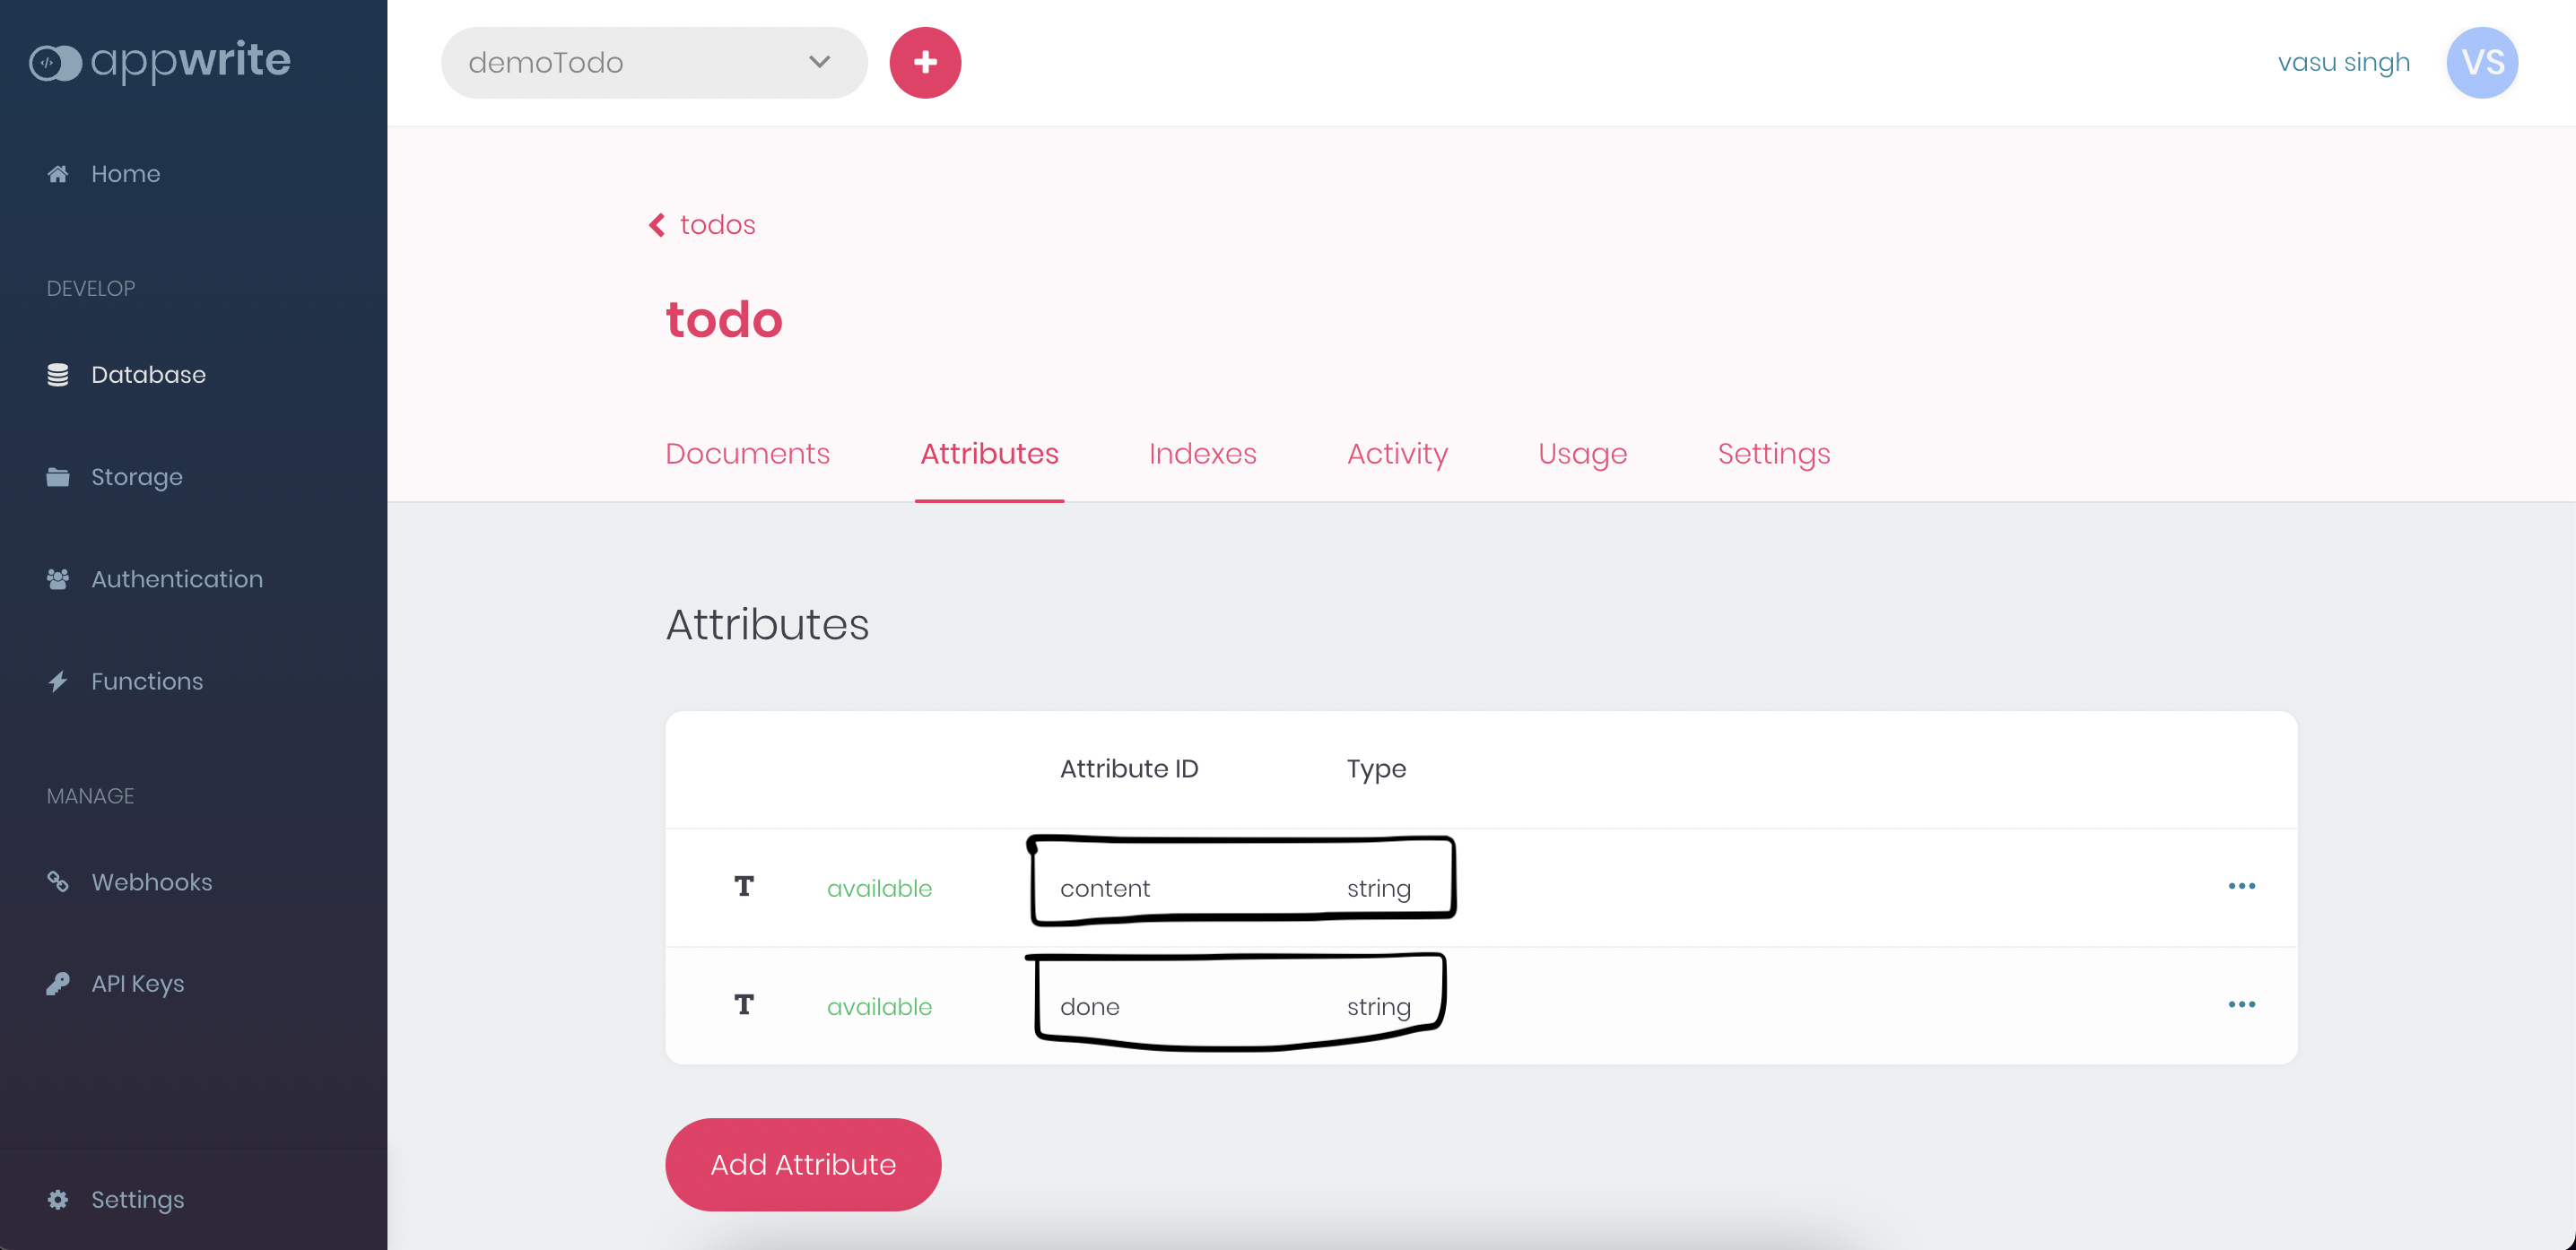
- In our collection now let's add the attribute, our todo has two string attributes one is its content(what the actual todo is) and the other is done means whether we complete the todo or not give the default value false to the done attribute.
Database

Collection
Attributes
Connect to appwrite backend
- Let's connect our app to the appwrite backend, In the project src folder create a folder name appwrite then create a file appwrite.js in it.
- Now, the code of appwrite.js file is something like this,
import { Client, Account, Databases } from 'appwrite'

const client = new Client()
client.setEndpoint('Your API Endpoint').setProject('Your project ID')

const account = new Account(client)
const database = new Databases(client, 'Your database ID')

export{
    client,
    account,
    database
}
- Let's take a look at the code, the client object connected our project to the appwrite backend the account object allows us to authenticate and manage the user account, and the last the database object connected our app to the database to which we get and create our todos.
- That's all for the appwrite.js file.
Components of our app
- Now create a folder named components in the src folder and create 4 files in it named Login.js Signup.js Todo.js ShowTodo.js,
    components
    ┣ Login.js
    ┣ ShowTodo.js
    ┣ Signup.js
    ┗ Todo.js
- Head over to the Signup.js its code looks like this at starting,
export default function Signup() {
    return (
        <div class='cont'>
            <div class="signup">
                <div class='signup-form'>SignUp</div>
                <div class='fields'>
                    <p>User Name</p>
                    <input
                        required
                        type='text'
                        placeholder='Enter your name'
                    />
                </div>
                <div class='fields'>
                    <p>Email</p>
                    <input
                        required
                        type='email'
                        placeholder='Enter your email'
                    />
                </div>
                <div class='fields'>
                    <p>Password</p>
                    <input
                        required
                        placeholder='Enter your password'
                        type='password'
                    />
                </div>
                <button class='signup-btn'>SignUp</button>
            </div>
        </div>
    )
}
- This is a basic signup form and there is no functionality to it now.
- Same to do with the Login.js and Todo.js also,
export default function Login() {
    return (
        <div class='cont'>
            <div class="login">
                <div class='login-form'>Login</div>
                <div class='fields'>
                    <p>Email</p>
                    <input
                        type='email'
                        placeholder='Enter your email'
                        required
                    />
                </div>
                <div class='fields'>
                    <p>Password</p>
                    <input
                        placeholder='Enter your password'
                        required
                        type='password'
                    />
                </div>
                <button class='signup-btn' onClick={login}>Login</button>
            </div>
        </div>
    )
}
export default function Todo() {

    return (
        <div class='goal-wrap'>
            <div class='goal-cont'>
                <h1>Your Goals</h1>
                <div class='inp'>
                    <input class='todo-inp'
                    placeholder='Add your goals' />
                    <button class='add-todo-btn'>Add Todo</button>
                </div>
            </div>
        </div>
    );
}
Routes
- Now, it's time to define the routes of our app, so go to the terminal and type
npm install preact-routerto install the preact router. - We define the routes of our app in the index.js and routing in preact is very simple and clear,
import './style';
import Todo from './components/Todo';
import Signup from './components/Signup';
import Login from './components/Login'

import { Router } from 'preact-router';

export default function App() {
    return (
        <div>
            <Router>
                <Todo path='/todo' />
                <Signup path='signup' />
                <Login path='/' />
            </Router>
        </div>
    );
}
Sign Up and Login functionality
- It's time to add the signup and login functionality to our project.
- Open the Signup.js and define three signal objects name, email and password to let the user signup.
- Now, you must be thinking that what the heck is signal, well it's nothing but they are used for managing the state of our application, and signal has very similar functionality to useState() hook of react, we can access the value of our signal object with the .value method.
const name = signal("")
const email = signal("")
const password = signal("")
- Now, binds these 3 objects by creating functions named setName(), setEmail() and setPassword() to our input field so that they can have the same value as we typed to the input field.
// example for set the user name
const setName = (e) => {
    name.value = e.target.value             // no rocket science in this
}
- Further, create a function named signUp() that triggers when we submit the user details to the appwrite backend.
- We can register a new user using the Account api of appwrite with
account.create('[USER_ID]', 'email@example.com', 'password')it returns a promise so make the signUp() function asyncronous. - That's all for our signup process and here is the complete code of Signup.js,
import { account } from '../appwrite/appwrite'
import { ID } from 'appwrite'
import { signal } from "@preact/signals";
import { route } from 'preact-router';
import { Link } from 'preact-router/match';

const name = signal("")
const email = signal("")
const password = signal("")

const setName = (e) => {
    name.value = e.target.value
}

const setEmail = (e) => {
    email.value = e.target.value
}

const setPassword = (e) => {
    password.value = e.target.value
}

export default function Signup() {

    const signUp = async(e) => {
        e.preventDefault()

        const promise = account.create(
            ID.unique(),
            email.value,
            password.value,
            name.value,
        )

        promise.then(function (response) {
            console.log(response)  // Success
            route('/todo', true)         // navigate to the todo section if signup is successfully
        }, function (error) {
            console.log(error)  // Failure
        })
    }

    return (
        <div class='cont'>
            <div class="signup">
                <div class='signup-form'>SignUp</div>
                <div class='fields'>
                    <p>User Name</p>
                    <input
                        required
                        type='text'
                        placeholder='Enter your name'
                        onInput={setName}
                    />
                </div>
                <div class='fields'>
                    <p>Email</p>
                    <input
                        required
                        type='email'
                        placeholder='Enter your email'
                        onInput={setEmail}
                    />
                </div>
                <div class='fields'>
                    <p>Password</p>
                    <input
                        required
                        placeholder='Enter your password'
                        type='password'
                        onInput={setPassword}
                    />
                </div>
                <button class='signup-btn' onClick={signUp}>SignUp</button>
                <Link href='/' class='links'>Have an Account!</Link>
            </div>
        </div>
    )
}
- The process for the login part is exactly the same as the signup one, we define 2 signal objects email and password, and binds these object to the input field as we do for signup part to let the user login,
const email = signal("")
const password = signal("")
- Define a function named Login() that triggers when we submit the login form in order to login to the app.
- Allow the user to login into their account by providing a valid email and password combination using
account.createEmailSession('email@example.com', 'password')it also returns a promise. - That's all for the login part, and the complete Login.js is,
import { client, account, database } from '../appwrite/appwrite'
import { ID } from 'appwrite'
import { signal } from "@preact/signals";
import { route } from 'preact-router';
import { Link } from 'preact-router/match';

const email = signal("")
const password = signal("")

const setEmail = (e) => {
    email.value = e.target.value
}

const setPassword = (e) => {
    password.value = e.target.value
}

export default function Login() {

    const login = (e) => {
        e.preventDefault()
        const promise = account.createEmailSession(email.value, password.value);

        promise.then(function (response) {
            console.log(response)  // Success
            route('/todo', true)
        }, function (error) {
            console.log(error)   // Failure
        })
    }

    return (
        <div class='cont'>
            <div class="login">
                <div class='login-form'>Login</div>
                <div class='fields'>
                    <p>Email</p>
                    <input
                        type='email'
                        placeholder='Enter your email' required
                        onInput={setEmail}
                    />
                </div>
                <div class='fields'>
                    <p>Password</p>
                    <input
                        placeholder='Enter your password'
                        required
                        type='password'
                        onInput={setPassword}
                    />
                </div>
                <button class='signup-btn' onClick={login}>Login</button>
                <Link class='links' href='/signup'><p class='have-acc'>Create an Account?</p></Link>
            </div>
        </div>
    )
}
- Let's check whether our app is working fine or not by signin and login to our app.
Sign Up
User
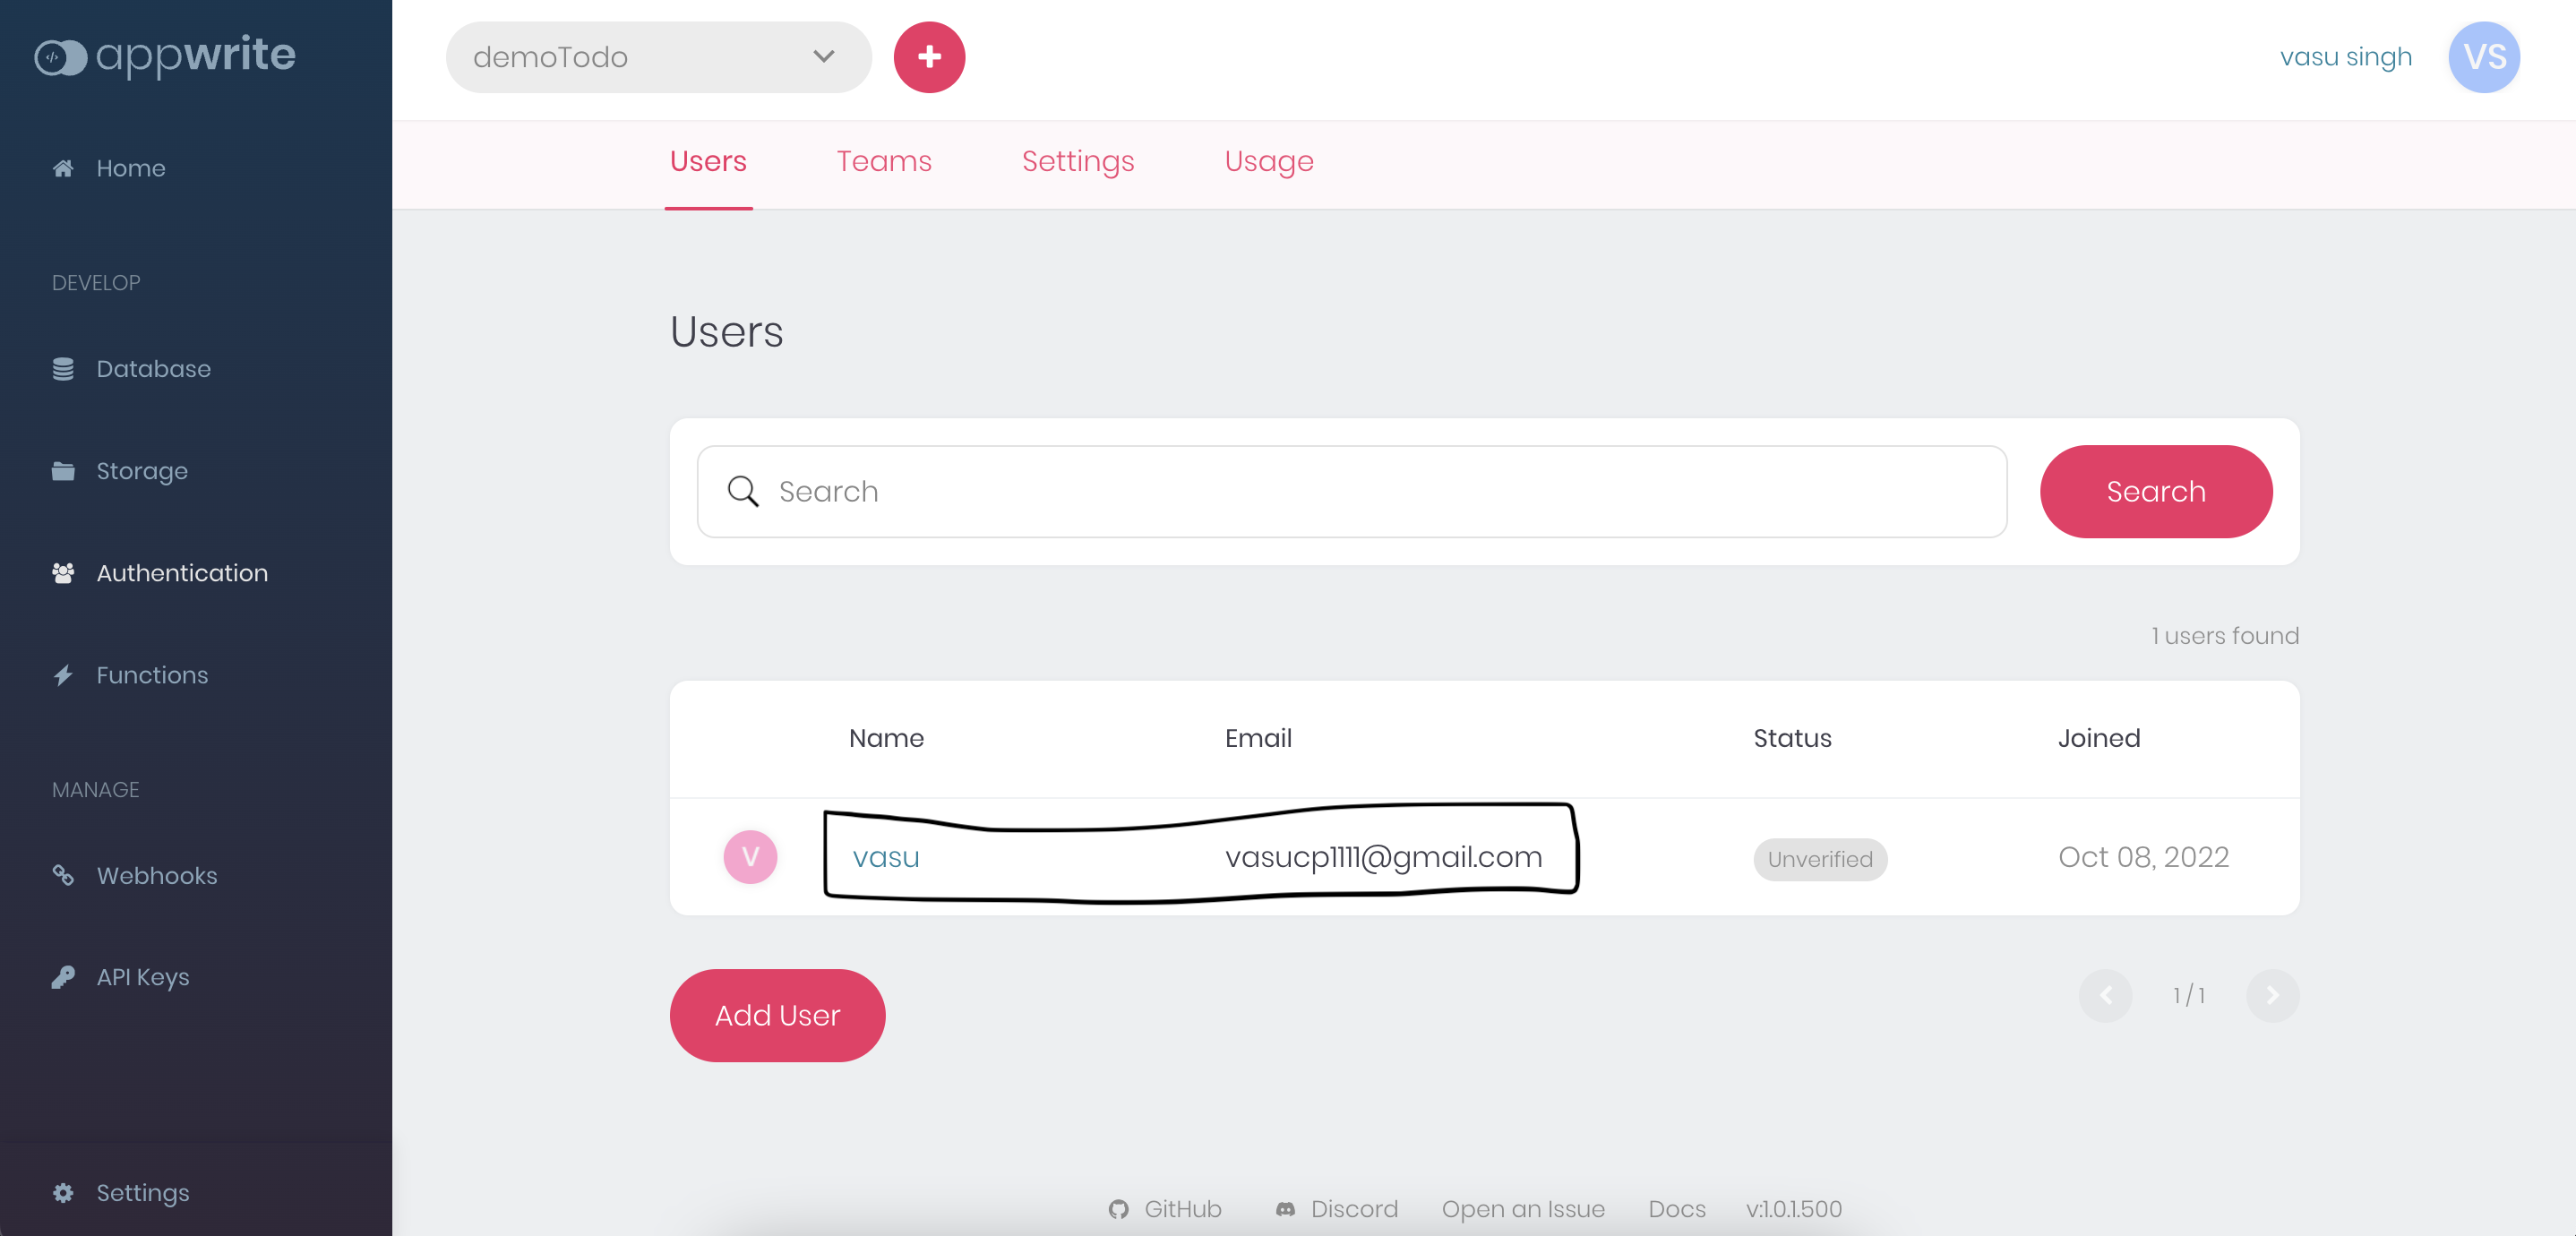
- Congratulation, it's working fine let's move ahead.
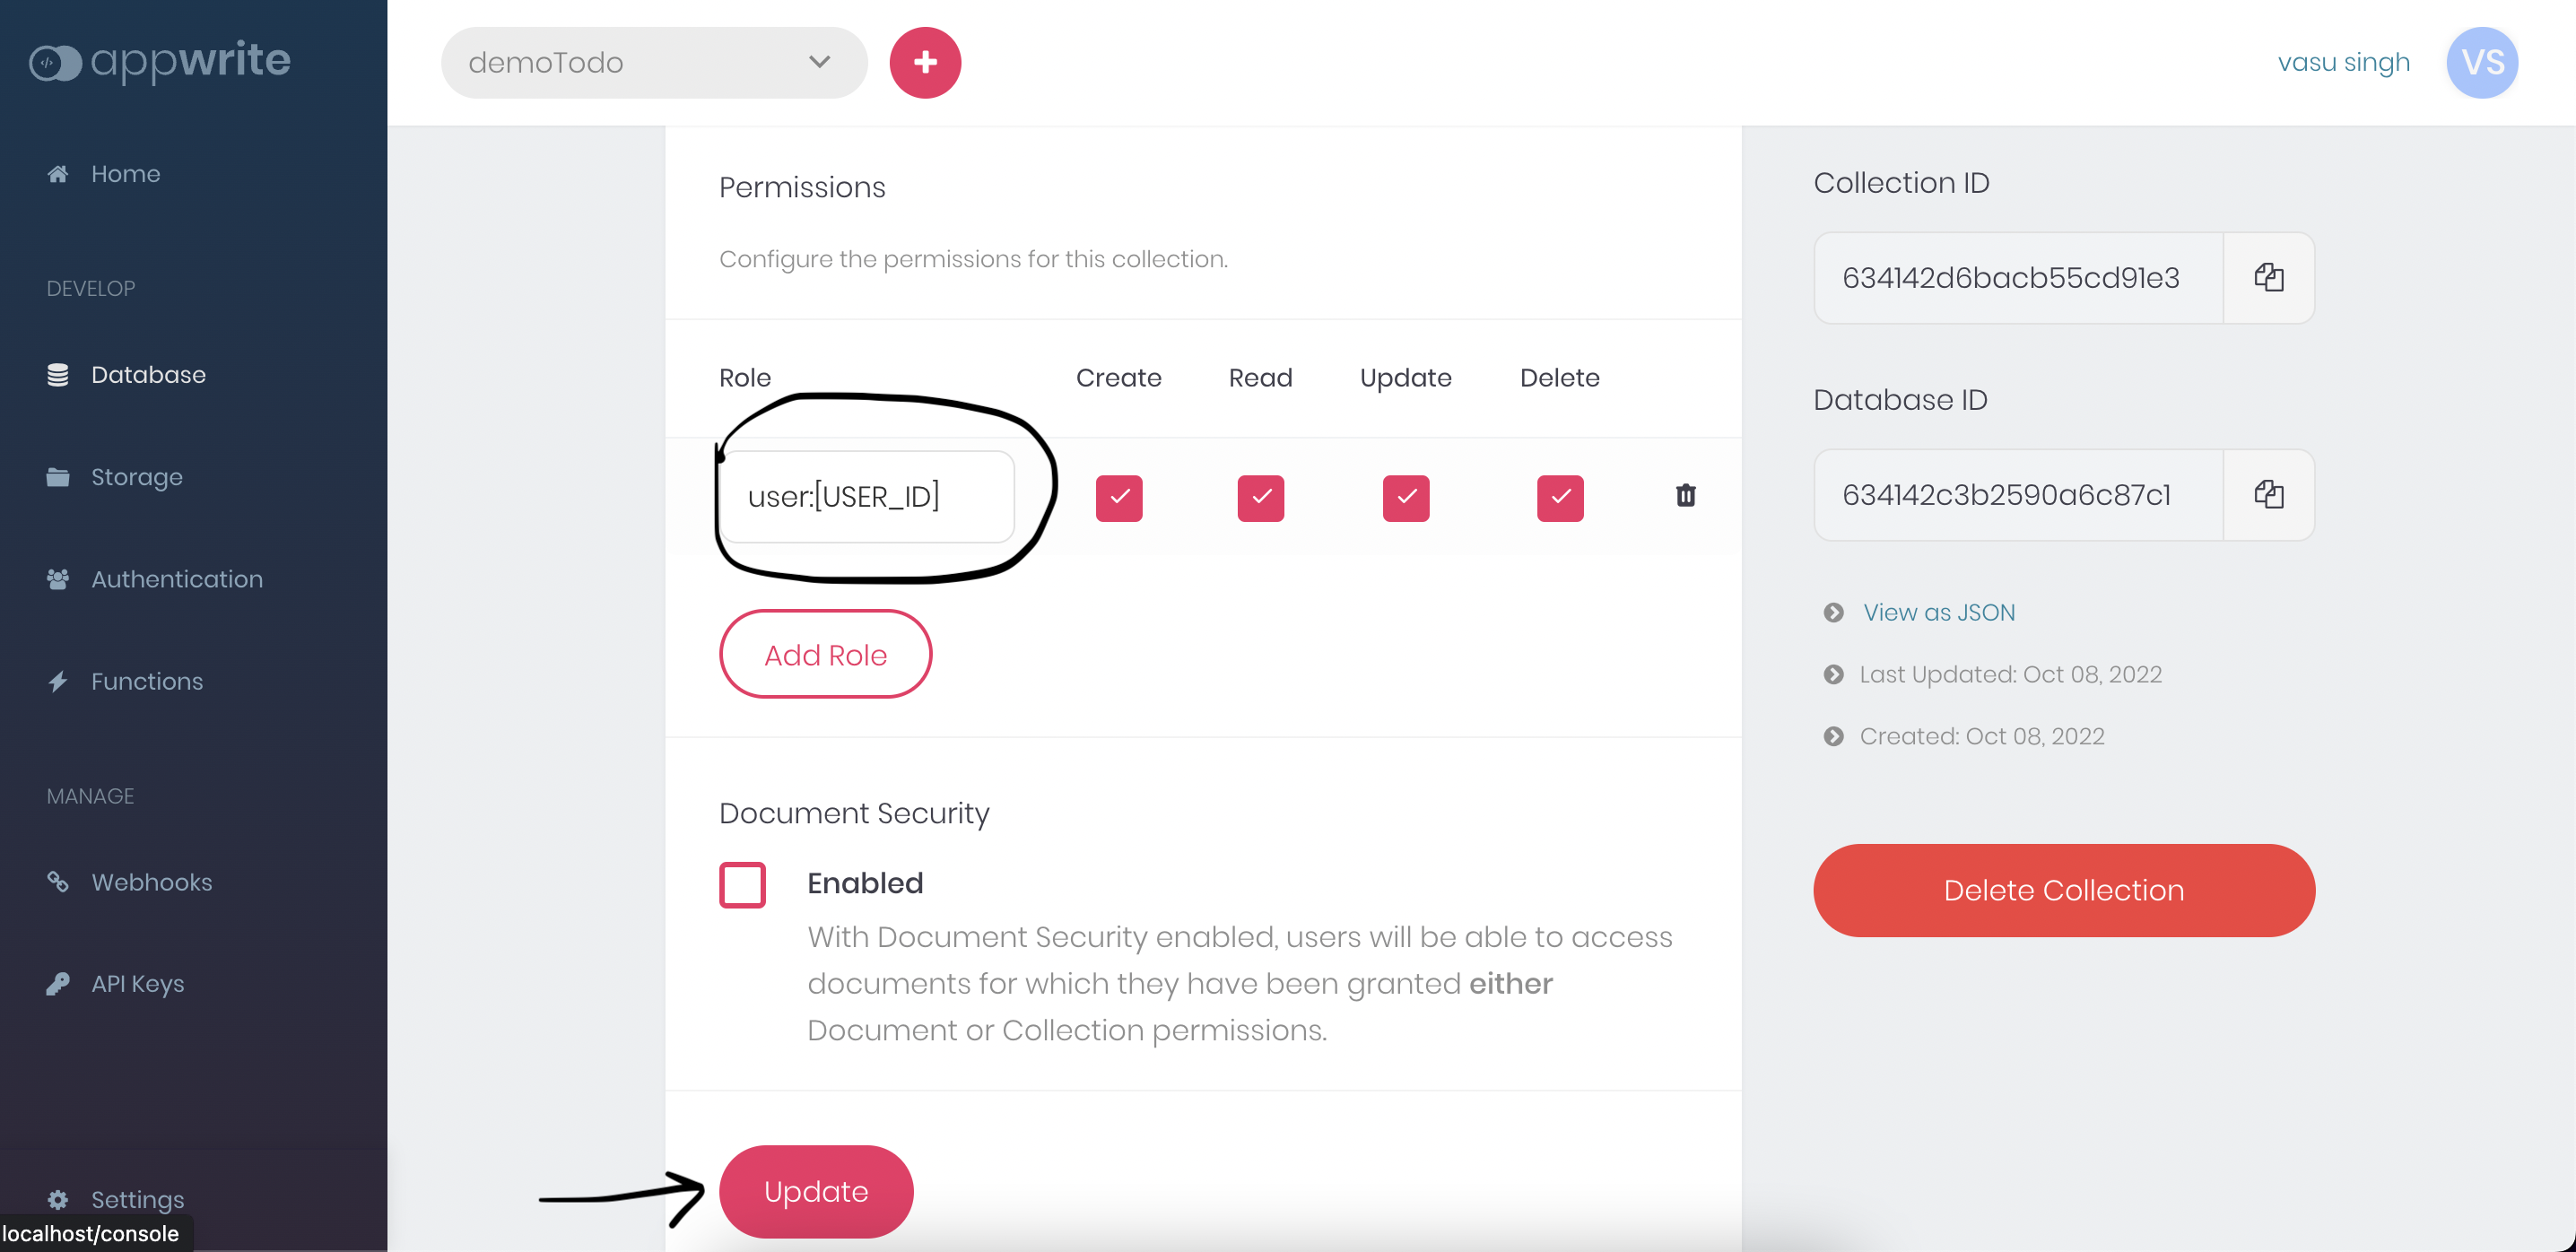
Adding Permissions Roles
- Before moving further let's configure the permissions for our todo collection, it allows us that which users, teams, or roles can access a specific resource in your project, like documents and files.
- Head over to the todo collection setting and add a role there for the user that you register in the app earlier by this only this particular user can access resources in your project.
Add Role
Add Todo to Database
- Now, move to the Todo.js and define a signal object todo it contains our current todo that we want to add to the collection, bind it to the input field as we do earlier,
const todo = signal("")
const setTodo = (e) => { todo.value = e.target.value }
- Define a function addTodo() for adding our todo to our database.
- We create a new Document in our Collection using
database.createDocument('[DATABASE_ID]', '[COLLECTION_ID]', '[DOCUMENT_ID]', {}). - That's all for adding the todo to our database, at this point Todo.js looks like this,
import { signal } from "@preact/signals";
import { database } from '../appwrite/appwrite'
import { ID } from 'appwrite'
import ShowTodo from './ShowTodo'

const todo = signal("")

const addTodo = (e) => {
    e.preventDefault()
    const promise = database.createDocument("633f403dcda63e88b76c", "633f404ac991d157efa9", ID.unique(),
    {
        content: todo.value,
        done: 'false'
    })
    promise.then(function (response) {
        console.log(response)  // Success
    }, function (error) {
        console.log(error)  // Failure
    })
    todo.value = ""
}

const setTodo = (e) => { todo.value = e.target.value }

export default function Todo() {

    return (
        <div class='goal-wrap'>
            <div class='goal-cont'>
                <h1>Your Goals</h1>
                <div class='inp'>
                    <input class='todo-inp' value={todo.value} onInput={setTodo} placeholder='Add your goals' />
                    <button class='add-todo-btn' onClick={addTodo}>Add Todo</button>
                </div>

                <ShowTodo />
            </div>
        </div>
    );
}
Rendering the Todos
- Now, the final part of our app is to list all the todos from our database.
- You can see that there is ShowTodo component in our Todo.js we use ShowTodo to render all our todos to our app.
- Head over to the ShowTodo.js and defines a signal object named goals which contains all goals that are in our project database.
const goals = signal([])
- We can get a list of all the user's documents in a given collection using the
databases.listDocuments('[DATABASE_ID]', '[COLLECTION_ID]'), we wrap it inside a useEffect() hook so that whenever we add a new todo we get a newly updated list and store it in the goals object that we defined above,
useEffect(() => {
    const promise = database.listDocuments("633f403dcda63e88b76c", "633f404ac991d157efa9")
    promise.then(function (response) {
        goals.value = response.documents  // Success
    }, function (error) {
        console.log(error)  // Failure
    })
}, [])
- Map over the goals object for showing our todos,
{goals.value.map((goal) => (
    <div class='goals-cont'>
        <p class='goal'>{goal.content}</p>
    </div>
))}
- Let's make a function removeGoal() for deleting a particular todo having an unique id we can do it by using
databases.deleteDocument('[DATABASE_ID]', '[COLLECTION_ID]', '[DOCUMENT_ID]')easily.
const removeGoal = (id) => {
    const promise = database.deleteDocument("633f403dcda63e88b76c", "633f404ac991d157efa9", id)
    promise.then(
        function (response) {
            console.log(response);
        },
        function (error) {
            console.log(error);
        }
    )
}
Let's mark a todo check or uncheck by updating the documents in our database with
databases.updateDocument('[DATABASE_ID]', '[COLLECTION_ID]', '[DOCUMENT_ID]').Define functions doneGoal() and undoGoal to check and uncheck the todos with a particular id,
const doneGoal = (id) => {
    const promise = database.updateDocument("633f403dcda63e88b76c","633f404ac991d157efa9", id, {
        done: 'true'                // mark this todo done(check)
    })
    promise.then(
        function (response) {
            console.log(response)
        },
        function (error) {
            console.log(error)
        }
        )
}

const undoGoal = (id) => {
    const promise = database.updateDocument("633f403dcda63e88b76c","633f404ac991d157efa9", id, {
        done: 'false'              // this todo is yet to done
    })
    promise.then(
        function (response) {
            console.log(response)
        },
        function (error) {
            console.log(error)
        }
    )
}
- Showing the todos according to their states done or not done yet differently with conditional rendering,
{goal.done == 'true'? <strike class='strike'><p class='goal'>{goal.content}</p></strike>: <p class='goal'>{goal.content}</p>}
- That's all for showing our todos, complete code of ShowTodo.js,
import { signal } from "@preact/signals";
import { database } from '../appwrite/appwrite'
import { useEffect } from 'preact/hooks';

const goals = signal([])
const completeGoal = signal('true')

function ShowTodo() {

    useEffect(() => {
        const promise = database.listDocuments("633f403dcda63e88b76c", "633f404ac991d157efa9")
        promise.then(function (response) {
            goals.value = response.documents  // Success
        }, function (error) {
            console.log(error)  // Failure
        })
    }, [goals.value])            // runs whenever the goals array changes

    const removeGoal = (id) => {
        const promise = database.deleteDocument("633f403dcda63e88b76c", "633f404ac991d157efa9", id)
        promise.then(
            function (response) {
                console.log(response);
            },
            function (error) {
                console.log(error);
            }
        )
    }

    const doneGoal = (id) => {
        const promise = database.updateDocument("633f403dcda63e88b76c", "633f404ac991d157efa9", id, {
            done: 'true'
        })
        promise.then(
            function (response) {
                console.log(response);
            },
            function (error) {
                console.log(error);
            }
        )
    }

    const undoGoal = (id) => {
        const promise = database.updateDocument("633f403dcda63e88b76c", "633f404ac991d157efa9", id, {
            done: 'false'
        })
        promise.then(
            function (response) {
                console.log(response);
            },
            function (error) {
                console.log(error);
            }
        )
    }

    console.log(!(completeGoal.value))

    return (
        <div>
            {goals.value.map((goal) => (
                <div class='goals-cont'>
                    {goal.done == 'true'? <strike class='strike'><p class='goal'>{goal.content}</p></strike>: <p class='goal'>{goal.content}</p>}
                    <div class='btn-cont'>
                        {goal.done == 'true' && <button class='goal-btn uncheck' onClick={() => undoGoal(goal.$id)}>⊘</button>}
                        {goal.done == 'false' && <button class='goal-btn check' onClick={() => doneGoal(goal.$id)}>✔️</button>}
                        <button class='goal-btn delete' onClick={() => removeGoal(goal.$id)}>❌</button>
                    </div>
                </div>
            ))}
        </div>
    )
}
export default ShowTodo
